Monday, July 14, 2014

The Bank's Chicken-Macaroni Salad

After spending 2 weeks in an Orlando area villa with my own kitchen and unlimited access to grocery stores, I have renewed my need for basic American food!  A few days ago, I made the corn and tomato salad and tonight I decided to make a traditional macaroni salad!

In looking through my cookbooks, the same one I used for the banana bread recipe on June 24 had a super macaroni salad with chicken.  Sounded delicious and was also contributed by someone who I know still works at the bank!  (I did not know her at the time this cookbook was purchased, but I speak to her quite often now!)


After coming home following my first Zumba class in almost 4 weeks, I was really looking forward to my delicious dinner of broiled salmon with lemon & herb rub from Morrisons, the corn and tomato salad and the chicken macaroni salad. The whole thing was absolutely scrumptious!  But the macaroni salad could actually stand alone for a light meal!


As usual, I will list the recipe on its own with no comments or photos at the end.


Chicken-Macaroni Salad


8 oz pkg noodles        
2 cups chopped cooked chicken
1 cucumber, sliced
4 - 5 stalks celery, sliced
4 - 6 radishes, sliced
1 small red onion, sliced into rings
3/4 mayonnaise
1/4 cup sour cream
2 Tbsp milk
1 tsp dried dill weed
1 tsp seasoned salt
1/4 tsp ground white pepper


Cook pasta according to package directions; drain.  In large bowl, combine pasta with chicken and vegetables.  In small bowl, blend mayonnaise, sour cream, milk and seasonings.  Toss dressing into salad mixture. Cover and refrigerate at least 2 hours or until well chilled.  Delicious!

There was a slight problem with my sour cream - it fell out of the fridge and broke!  But only using mayo was good enough!  You will also see - in the photo of ingredients- scallions.  These are not listed but I decided to throw them in since I was afraid they would go bad.  (my long suffering husband has been looking forward to using these with his potatoes....uh oh!)

and in stead of seasoned salt, which quite often contains cumin, I used some Zatarain's Big & Zesty Garlic & Herb, purchased when we were in New Orleans.  Fabulous!


“squats are a form of torture designed by people who don’t need to do squats in the first place” 


Chicken-Macaroni Salad

8 oz pkg noodles        
2 cups chopped cooked chicken
1 cucumber, sliced
4 - 5 stalks celery, sliced
4 - 6 radishes, sliced
1 small red onion, sliced into rings
3/4 mayonnaise
1/4 cup sour cream
2 Tbsp milk
1 tsp dried dill weed
1 tsp seasoned salt
1/4 tsp ground white pepper

Cook pasta according to package directions; drain.  In large bowl, combine pasta with chicken and vegetables.  In small bowl, blend mayonnaise, sour cream, milk and seasonings.  Toss dressing into salad mixture. Cover and refrigerate at least 2 hours or until well chilled.


Saturday, July 12, 2014

Tomato and Corn Salad

After a lovely fortnight in Orlando, we are back home and watching the runner up World Cup game on tv and dealing with our jet lag.  Ok, when I say lovely time, I mean hectic, exhausting, hot, busy and a very, very special  trip.  But I felt the need to try some new recipes!
We went with the main purpose of our 5 year old grandson being introduced to Mickey Mouse and the wonders of Disney and also the chance to spend some time with his American family.  I have not caught up with the blog about that but will do that soon!

Whenever I go home, I do binge on American magazines and this trip was no exception.  I did limit myself to 4 (mainly due to the luggage allowance restrictions!) and am really looking forward to working through them all.  Yesterday, while lying in the sun in my backyard in Scotland ( really!), I discovered this very simple recipe and tried it tonight.

It could not have been easier and is delicious!  It calls for fresh corn cut from about 6 ears, but we do not often have fresh corn on the cob here, and it is a bit too pricey to just cut the corn off. So I used large cans of corn instead.

As always, a plain recipe with no notes or photos will follow at the end.

This if from the July issue of Woman's Day:


Tomato and Corn Salad  

Serves 12


In a large bowl, combine 6 cups fresh corn kernels (cut from about 6 ears), 2 lbs cherry tomatoes (halved), 4 scallions (thinly sliced), 4 jalapeños (seeded and thinly sliced), 1/4 cup olive oil, 1/4 cup fresh lime juice, 1 tsp salt and 1/4 tsp pepper.

I only had 1 1/2 lbs tomatoes so used 2 large cans of corn with this.  I also did not add jalapeño peppers just because I was not in the mood for this tonight.  But I am sure they would be great in this salad!  

Mixing in a clear plastic bowl, you can see the layers before I mix it up - 

Serve with grilled steak or chicken for an easy weeknight meal.


“That sure is swell!”   Mickey Mouse


Tomato and Corn Salad  

Serves 12

In a large bowl, combine 6 cups fresh corn kernels (cut from about 6 ears), 2 lbs cherry tomatoes (halved), 4 scallions (thinly sliced), 4 jalapeños (seeded and thinly sliced), 1/4 cup olive oil, 1/4 cup fresh lime juice, 1 tsp salt and 1/4 tsp pepper.

Serve with grilled steak or chicken for an easy weeknight meal.


Tuesday, June 24, 2014

The Bank's Banana Bread

It is amazing the effect that some people have on the rest of someone's life.....my first housemate introduced me to the concept of never throwing away too ripened bananas.  At the time, I worked at A & W Root Beer and they did a mean banana split.  As a result, there were old bananas all over the place!  And Diane suggested I bring them home to make banana bread!  That was approximately 1972.  Over 40 years later, my husband will notice ripened bananas and he knows there will soon be something good to eat!  (In looking up A&W, the menu didn't show banana splits!)

Last night was one of those nights, I should have been packing and cleaning the house, but those bananas were shouting my name......

Even after all this time, I still try new recipes instead of just doing a good recipe over and over.  So I got out a lovely cookbook published in 2003 by The Citizens Bank of Geneva.  This was Mom's bank the whole time she lived there and up until her death in 2012.  This was one of those lovely small town banks where you are very welcome when you enter and the feel of it is spacious and comfortable.  Nothing like modern banks that feel like institutions.

Sadly, the Citizens Bank no longer exists and has been taken over by the Bank of the Ozarks.  In trying to find a picture of the bank building, I came across the announcement of when the bank was taken over, the same day my Mom passed away -  December 31, 2012  The building still feels as welcoming, and there are still some of the previous employees there, but it is now part of a larger group so it no longer feels like a home grown bank.  Not sure how Mom would feel about the changes, but life goes on and you just have to go with the flow.

After I published this on Facebook and explained I could not locate any photos of the bank, either my own, or on the internet, one of my friends sent me this link, so you can see what a nice, small town bank it is!  Bank of the Ozarks  Thanks, Joni!

The name of the cookbook is "From Our Kitchens to Yours'" from The Citizens Bank of Geneva.  It is that sort of fundraising cookbook you see quite often, but it does not say what they are fund-raising for, maybe it was the bank!  I do have a note that I tried this recipe in January 2013 and it had 2 stars, but I never blogged it then.  That was only 2 weeks after Mom had passed away, actually surprised I was baking, but the bananas must have been there and I would have just done something with them.

The recipe I am going to share is on page 58 and was submitted by Sherrell Weeks.

As always, the same recipe will follow the one with photos and notes, and all measurements are mine and I hope I have done the conversions well enough for anyone to follow.  I actually made 2 loaves at the same time and one was with those conversions, so they should be ok!

I took one loaf to work today, only 3 people in the office due to folks being away on vacation.....but we managed to eat the whole thing.  Not a good idea really, but it was delicious!


Banana Nut Bread    Makes one loaf


2 1/2 cups / 383 g/ 13 1/2 oz  all purpose flour
3 tsp baking powder
1/2 tsp salt
1/2 tsp baking soda (bicarbonate of soda)
1/2 cup / 113g/ 4 oz butter, softened 
1 cup / 296 g/ 10 1/2 oz sugar
3 large eggs
3 large ripe bananas
1/2 cup chopped pecans   (I consider adding nuts optional or add other things like chocolate chips)


Preheat oven to 350F, 170C.  Grease a loaf pan.

Yes, pink Himalayan Salt!  Not sure it makes any difference
in taste, but I love using it!


Sift together flour, salt, baking soda, and baking powder.


Beat together butter and sugar until light and fluffy.

Add eggs, one at a time, beating well after each one.

Beat in bananas; gradually add flour mixture until well blended.


Also blend in nuts.  Or add chocolate chips, my family prefers these to nuts in banana bread!


Spoon batter into pan and cook for about 50 - 55 minutes or until done.


"With a piece of bread in your hand you’ll find paradise under a pine tree." – Russian Proverb


Banana Nut Bread    Makes one loaf

2 1/2 cups / 383 g/ 13 1/2 oz  all purpose flour
3 tsp baking powder
1/2 tsp salt
1/2 tsp baking soda (bicarbonate of soda)
1/2 cup / 113g/ 4 oz butter, softened 
1 cup / 296 g/ 10 1/2 oz sugar
3 large eggs
3 large ripe bananasSpoon batter into pan and cook for about 50 - 55 minutes or until done.1/2 cup chopped pecans   (I consider adding nuts optional or add other things like chocolate chips)


Preheat oven to 350F, 170C.  Grease a loaf pan.
Sift together flour, salt, baking soda, and baking powder.
Beat together butter and sugar until light and fluffy.
Add eggs, one at a time, beating well after each one.
Beat in bananas; gradually add flour mixture until well blended.
Also blend in nuts.  Or add chocolate chips.
Spoon batter into pan and cook for about 50 - 55 minutes or until done.

Friday, June 13, 2014

Making Brownies (again!)

It is not that I really, really love Brownies, I just really, really love chocolate!  And right now I am trying to clear my cupboards.  That sounds more respectable than it should.  I am trying to use up all the American food (read chocolate) before we go back and I want to buy more!

After 28 years living in Scotland, I have truly adjusted and adapted.  This means I can honestly live without sweet pickle relish, grape jelly and instant chocolate pudding mix!  My poor Mom used to come over here with one suitcase full of the strangest assortment of food!  But there are just some things that are not the same over here.  And that is mainly the size and variety of the bags of chocolate chips and Baker's chocolate squares.

To be perfectly honest, I don't understand Baker's chocolate squares, they are just big squares of unsweetened chocolate used in baking.  I imagine you could substitute any comparable type of chocolate, but I find the presence of chocolate squares comforting.  In saying that, I usually buy them, bring them back here and forget to use them. So my mission before boarding the plane for Orlando is to use up what I have from last year!


Another of my obsessions is buying cookbooks.  I think I have that under control, but you never know when I might see a unique one I must have!  Like the Brownies and Bars glorified magazine I picked up in Publix last year on one of our food buying sessions in Fort Walton Beach, FL.  This is published by Better Homes and Gardens and it fell into my shopping trolley!  I have enjoyed looking at it, but never tried any recipes until tonight!  And I think I will use it a lot now, it has so many fun recipes in it!  And some even use chocolate squares!

Like the Basic Brownie recipe made in one pot!  Too good to be true and so easy.  This could be a very dangerous recipe!  Looking for any excuse to bake, I decided to bring Brownies to work tomorrow.  We are having an all day team building session and what helps glue teams together better than luscious, delicious Brownies!

I have tried to convert the American measurements into ounces and grams and hope they work out for you if you try them!  And, as always, the "basic" no photos or notes recipe will follow at the end.

Basic One Pot Brownie    -  Fudgy Brownies
Prep:  20 minutes     Cool:  15 minutes     Bake:  30 minutes at 350F/about 180C


1/4 cup/ 4 oz/ 113 g   butter

3 ounces unsweetened chocolate, coarsely chopped

1 cup/ 10 oz/ 290 g  sugar

2 eggs

1 teaspoon vanilla

2/3 cup/ 5 oz/ 145g all purpose flour

1/4 teaspoon baking soda (bicarbonate of soda)

1/2 cup chopped nuts (optional)

Regardless of what kind of chocolate you use, it makes it easier to chop it up before beginning to melt with with the butter.


1.  In a medium saucepan heat and stir butter and unsweetened chocolate over a low heat until smooth
and set aside to cool.  (The timing at the top states cooling time 15 minutes, so that is what I did and it was just enough!)

Meanwhile, preheat oven to 350F.   Line an 8 x8x2 inch baking pan and either grease pan or line it with greased foil or baking parchment.


2.  Stir sugar into cooled chocolate mixture.

Add eggs, one at a time, beating with a wooden spoon just until combined.  Stir in vanilla.  In a small bowl stir together flour and baking soda.  Add flour mixture to chocolate mixture; stir just until combined.  If desired, stir in nuts. *

Spread batter evenly in the prepared pan.


3.  Bake for 30 minutes.  Cool in pan on a wire rack.

If desired, spread frosting over cooled brownies.  Cut into squares.  Makes 14 brownies.  (this might be true if you cut them in the size you might get in a bakery - like most Americans are used to, but I got  28 nice bite size brownies, and as rich as they are, that is big enough!)

*I added 1/2 cup chocolate chips instead of the optional nuts. Why? Because I had an open bag and that is not a good thing in my kitchen. Better to put those chocolate chips in the Brownies than let me continue to snack on them.  I am ok with any chocolate in the house - as long as it is not open!

There is a Chocolate-Cream Cheese Frosting suggested with this recipe, but I cannot imagine adding frosting on to any brownie. Yes, I have had many brownies with frosting, and it is delicious. But why?  Brownies are wonderful just as they are, and they don't need extras!


"If everyone is moving forward together, then success takes care of itself."Henry Ford


Basic One Pot Brownie    -  Fudgy Brownies
Prep:  20 minutes     Cool:  15 minutes     Bake:  30 minutes at 350F/about 180C

1/4 cup/ 4 oz/ 113 g   butter

3 ounces unsweetened chocolate, coarsely chopped

1 cup/ 10 oz/ 290 g  sugar

2 eggs

1 teaspoon vanilla

2/3 cup/ 5 oz/ 145g all purpose flour

1/4 teaspoon baking soda (bicarbonate of soda)

1/2 cup chopped nuts (optional)

1.  In a medium saucepan heat and stir butter and unsweetened chocolate over a low heat until smooth
and set aside to cool.  Meanwhile, preheat oven to 350F.   Line an 8 x8x2 inch baking pan and either grease pan or line it with greased foil or baking parchment.

2.  Stir sugar into cooled chocolate mixture.  Add eggs, one at a time, beating with a wooden spoon just until combined.  Stir in vanilla.  In a small bowl stir together flour and baking soda.  Add flour mixture to chocolate mixture; stir just until combined.  If desired, stir in nuts.  Spread batter evenly in the prepared pan.

3.  Bake for 30 minutes.  Cool in pan on a wire rack.  If desired, spread frosting over cooled brownies.  Cut into squares.  Makes 14 brownies.  (this might be true if you cut them in the size most Americans are used to, but I got  30 nice bite size brownies, and as rich as they are, that is big enough!)

Monday, June 9, 2014

Sugar Cookies for the June Cupcake book club

Recently, a friend asked me what weight a cup is and I referred her to a web page from one of my last Christmas cookie swap fellow bloggers.  When I received her delicious cookies, I looked up her blog and that was when I discovered she was a fellow American living in Scotland.  Her blog has been really helpful to me because of her lists of converted weights and measures.  The differences in how folks in the UK and the US cook are much different than just pounds versus grams and this chart is fantastic!  So, I listed her information on my "pages" and I believe I informed her of that at the time....!  This information can be found listed as American Cupcake Abroad/Conversion Chart.  It is a wonderful reference when baking and I continue to be grateful for this!

But when I looked up her blog this time I discovered:

 1. She has moved back to the States after living in the UK for 10 years!   (I wonder what that was like?)

2.  She has included a book club in her blog!   This intrigued me, so I ordered the book!  One major problem though - when I decided I wanted to read the book and contribute a recipe based on how ever the book inspired me, it was June 1 and the rules were you had to read the book, decide and act upon the recipe or whatever you wanted to do and post your blog to share with American Cupcake Life by June 10.  Uh oh!

I immediately ordered The Union Street Bakery by Mary Ellen Taylor and received it 2 days later.  When I first started reading the story, it reminded me of the books by Debbie Macomber. Nice stories about tragedy, challenge and love.  Don't get me wrong, I love Debbie Macomber's books but they are just a bit too "feel good" sometimes.  But I was determined to finish the whole book club project......

And then, the book grabbed me and I could not put it down.  All I will say is it is about a very successful career woman who loses her job and has to go home to help her family's business, which happens to be a bakery. She had a tough start to her life  by being abandoned by her mother but was taken in by the family who owns the bakery she now has to help save.  A good enough story in itself, but then throw in history, journals, ghosts and slavery!  Wow!  The book became impossible to put down and I highly recommend it!


Finished the book on Friday, June 6 and decided to make sugar cookies.  They are mentioned many times in the book and I have never made such a simple cookie and decided it was about time!  The recipe in the book only makes 2 dozen though and called for ingredients I did not have to hand. So I used the internet and found a fabulous recipe at all recipes.co.uk  for Sugar Cookies

All the reviews said how easy and delicious these cookies were, and they were so right.  I love these cookies and believe I will make them over and over again.  What a great discovery, all this because my friend, Kerry, asked me what weight a cup was!  Thank you, Kerry!


Recipe with no notes or photos can be found at the end.

and many apologies to all the folks who have already viewed this....I did it in such a hurry to meet the deadline, I forgot to put the conversions!  I am adding them now with the reminder that these are my guestimates and I can only hope they are correct. They seem correct to me!

Sugar Cookies:


5 Ingredients!  All probably sitting in your cupboard
waiting for you to make these cookies!

Ingredients

Makes: 4 dozen

225g butter, softened  ( 1 cup)

200g sugar  (3/4 cup)

1 egg

1 teaspoon vanilla

340g self raising flour  (2 cups)

Method

Prep:15min  ›  Cook:10min  ›  Ready in:25min 


Long before step 1, I took my butter out and left it to sit for hours!  It was wonderfully soft 
and I think this is one reason these cookies tasted so good!  


  1. Preheat oven to 190 C / Gas 5 / 375 F  (just found a great website for oven temp conventions!)
  2. In a large bowl, cream together the butter and sugar until light and fluffy. Beat in egg and vanilla. Gradually mix in the flour. Roll rounded teaspoonfuls of dough into balls, and place onto ungreased baking trays.
  3. Bake 8 to 10 minutes in the preheated oven, or until golden. Let stand on tray two minutes before removing to cool on wire racks.
I use a convection oven and have to go 20 degrees cooler.  I then never remember if I should bake the whole time or a bit shorter......So my first 2 dozen were a bit brown, but tasty, because I used the whole 10 minutes.  Then I had a look at the picture on the recipe and noticed these cookies are almost white.  So the timing for my oven is 8 minutes.  In the following picture, you can see the difference in colour, but both "types" taste wonderful, if I do say so myself!

I got 4 1/2 dozen!


"You cannot open a book without learning something."  Confucious


This is a direct copy from the website, why mess with perfection?

Sugar Cookies:


Ingredients

Makes: 4 dozen


225g butter, softened  (1 cup)

200g sugar  (3/4 cup)

1 egg

1 teaspoon vanilla

340g self raising flour  (2 cups)


Method

Prep:15min  ›  Cook:10min  ›  Ready in:25min 

  1. Preheat oven to 190 C / Gas 5.
  2. In a large bowl, cream together the butter and sugar until light and fluffy. Beat in egg and vanilla. Gradually mix in the flour. Roll rounded teaspoonfuls of dough into balls, and place onto ungreased baking trays.
  3. Bake 8 to 10 minutes in the preheated oven, or until golden. Let stand on tray two minutes before removing to cool on wire racks.


Saturday, June 7, 2014

Weekly Meal Planning Part 3 - Courgette (Zucchini) and Tarragon Soup


This is the last part of what started as one blog covering the various recipes I picked to get Alan and I through the week!

Some of my friends have their own gardens and are usually looking for new ways to use up their zucchini so I am posting especially for them!  And also the last time I posted a zucchini soup recipe, about 2 years ago, it has been looked up at least once daily and continues to be my most popular post.  Let's see if this recipe gives it any competition!

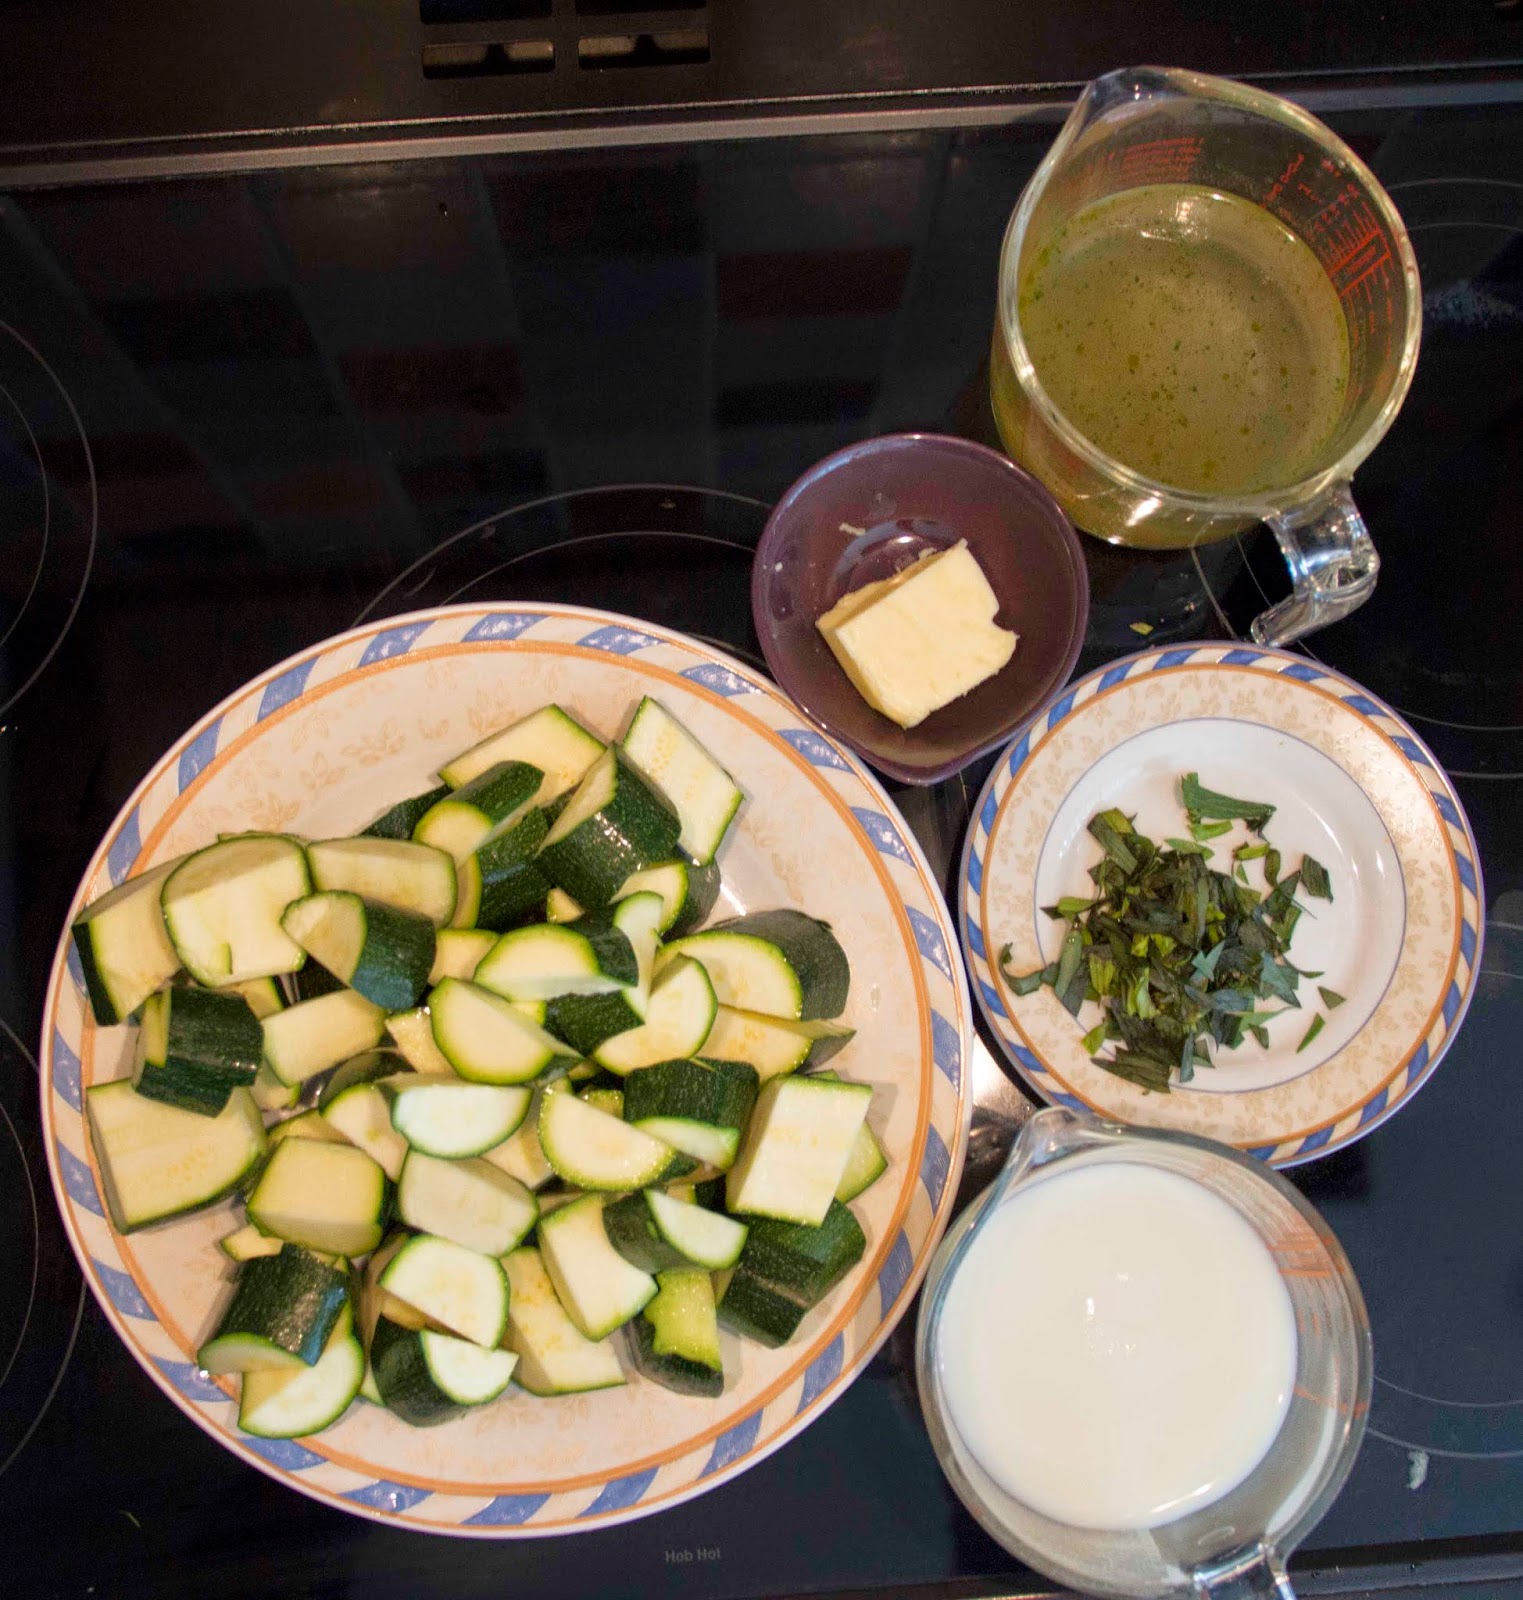
The recipe for Courgette & Tarragon Soup comes from the New Covent Garden Food Co's book - A Soup for Every Day.  This recipe is for June 2..... recipe with no notes or photos will be found at the end of this blog.

 Courgette & Tarragon Soup   Cooking time  35 minutes    Serves 4

  Ingredients


25g Butter
4 medium Courgettes, chunked
1-2 tablespoons fresh tarragon, chopped
300 ml vegetable stock
300 ml milk


1. Melt butter in a saucepan, add the courgettes, then cook gently for 5 minutes.

2. Add the tarragon, then cook gently for a further 5 minutes.

3. Add the stock, which should almost cover the courgettes, bring to the boil, then cover and simmer for 15 minutes, until courgettes are tender.

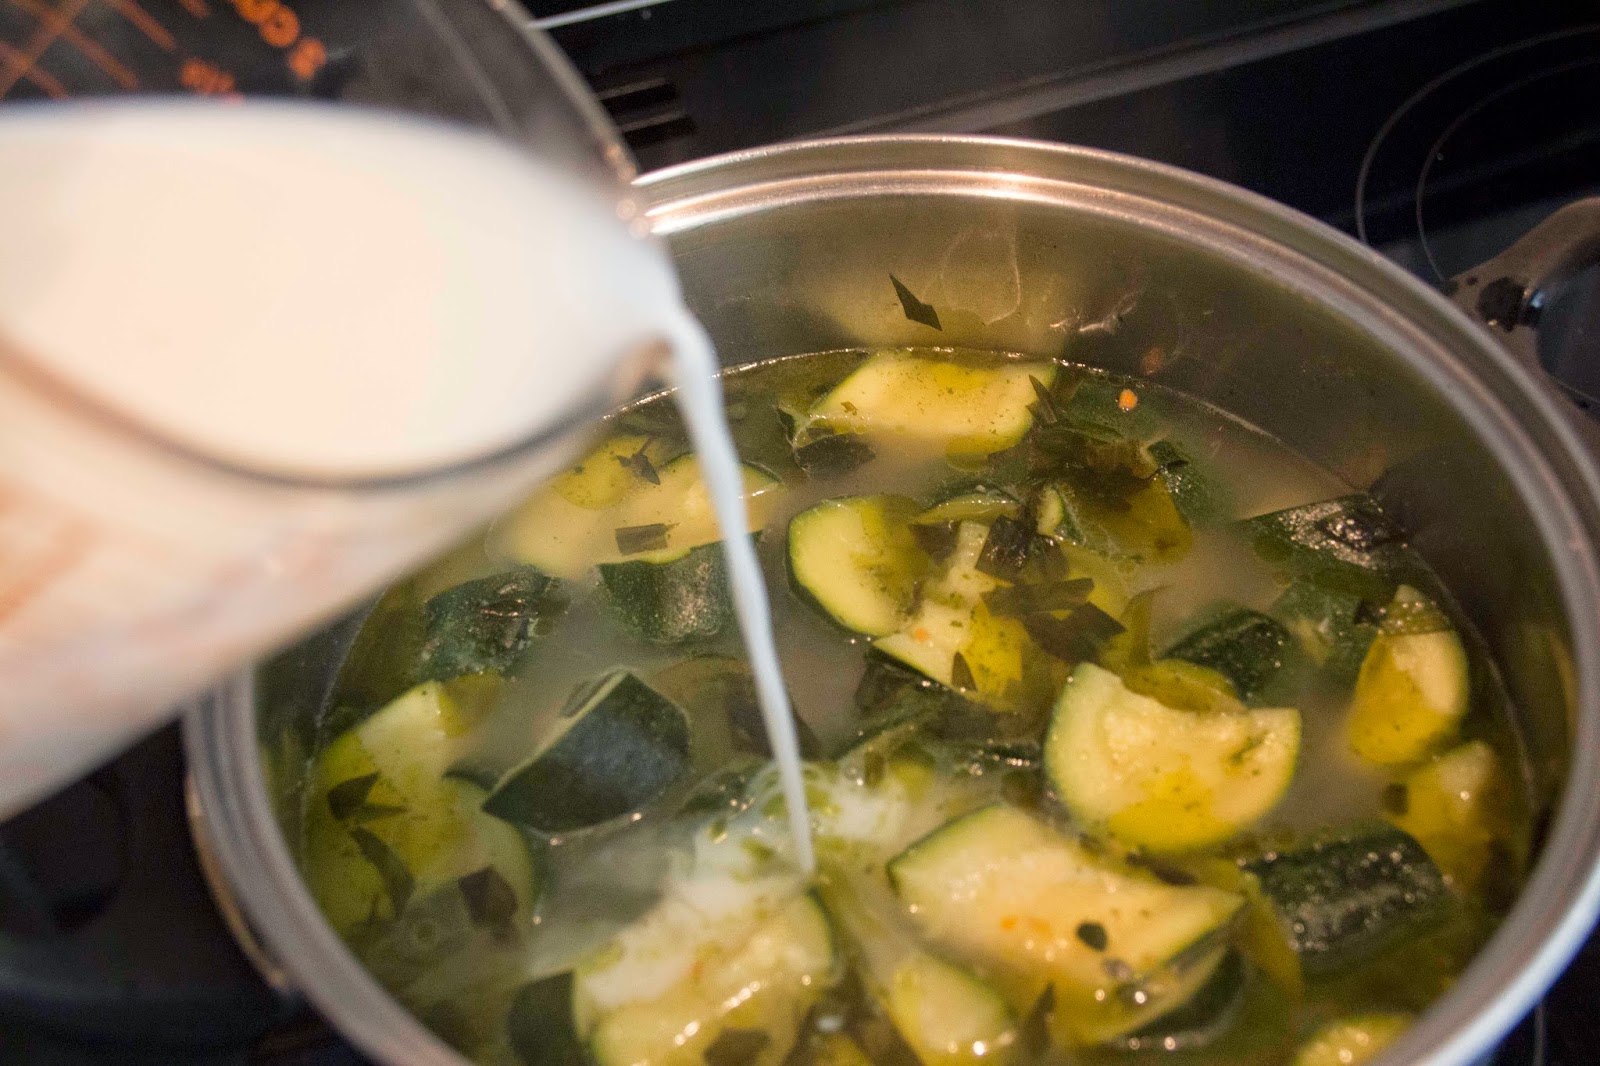
4. Add the milk, then blend until smooth.

5. Season to taste, then reheat gently for 3 minutes and serve.


Earth is here so kind, that just tickle her with a hoe and she laughs with a harvest.
Douglas Jerrold 1803-1857


Courgette & Tarragon Soup   Cooking time  35 minutes    Serves 4

Ingredients

25g Butter
4 medium Courgettes, chunked
1-2 tablespoons fresh tarragon, chopped
300 ml vegetable stock
300 ml milk

1. Melt butter in a saucepan, add the courgettes, then cook gently for 5 minutes.

2. Add the tarragon, then cook gently for a further 5 minutes.

3. Add the stock, which should almost cover the courgettes, bring to the boil, then cover and simmer for 15 minutes, until courgettes are tender.

4. Add the milk, then blend until smooth.

5. Season to taste, then reheat gently for 3 minutes and serve.


Thursday, June 5, 2014

Weekly Meal Planning part 2 - Chicken Tarragon


I chose  Tarragon Chicken Thighs from the Weightwatchers' Members Favourites cookbook  because it sounded delicious and easy.   In the introduction, the author of this recipe says every time she makes it, her family are full of compliments!

It turned out to be tasty, but I felt like something was missing and wondered how her family could love this recipe so much.......it was about 2 days later when I realised I forgot to add the creme fraiche at the last step.  No wonder it was a bit blah!  We will definitely try this one again!

Just the recipe with no photos follows at the end.


Tarragon Chicken Thighs                                  Serves 4 at 9pp per serving   (34 pp per recipe)
10 minutes preparation, 2 hours cooking

600g (1lb 5 oz) skinless boneless chicken thighs  *
1 tablespoon roughly chopped fresh tarragon or 2 teaspoons dried tarragon
850 ml (1 1/2 pints) (3 cups) chicken stock
2 large leeks, chopped roughly
3 tablespoons reduced fat creme fraiche (you could substitute sour cream or plain yogurt if necessary)
freshly ground black pepper


*You will see that my ingredients are not what is listed!  In addition to halving the recipe, I also used chicken breasts.  If using chicken breasts the values are 5 pp per serving!

1.  Preheat oven to Gas Mark 4/180C/or 160C if using a fan oven/350F.

2.  Place the chicken in a large ovenproof dish with a tight fitting lid, add the tarragon to the stock and pour over the chicken.  Season with black pepper.

3.  Scatter the leeks over the top of the chicken.  cover and cook for 2 hours.

4.  When cooked, stir in the creme fraiche and serve.  Be sure not to forget this important step like I did!

* if using chicken breasts - it would need 4 x 150 g (5 1/2 oz) skinless boneless chicken breasts.  


"Ask not what you can do for your country.  Ask what's for lunch."  Orson Welles


Tarragon Chicken Thighs                                  Serves 4 at 9pp per serving   (34 pp per recipe)
10 minutes preparation, 2 hours cooking

600g (1lb 5 oz) skinless boneless chicken thighs  *
1 tablespoon roughly chopped fresh tarragon or 2 teaspoons dried tarragon
850 ml (1 1/2 pints) (3 cups) chicken stock
2 large leeks, chopped roughly
3 tablespoons reduced fat creme fraiche (you could substitute sour cream or plain yogurt if necessary)
freshly ground black pepper


*You will see that my ingredients are not what is listed!  In addition to halving the recipe, I also used chicken breasts.  If using chicken breasts the values are 5 pp per serving!

1.  Preheat oven to Gas Mark 4/180C/or 160C if using a fan oven/350F.

2.  Place the chicken in a large ovenproof dish with a tight fitting lid, add the tarragon to the stock and pour over the chicken.  Season with black pepper.

3.  Scatter the leeks over the top of the chicken.  cover and cook for 2 hours.

4.  When cooked, stir in the creme fraiche and serve.

* if using chicken breasts - it would need 4 x 150 g (5 1/2 oz) skinless boneless chicken breasts.